Djo Labs

Simple electronics for Fun !

How to build a 230Vac LED light

There is varous ways to build a 230Vac LED light, from the simple and lower cost, to the most complex and higher cost (but higher reliability)

Here are some examples for you :

This is the simplest way to power a LED from 230Vac, to make an indicator for example...
image post
I used almost the same principle to build my christmas lights (but with a overvoltage protection)
Pros : Very simple and very low cost.
Cons : Very poor efficiency, reliability and voltage spike resistance. No current regulation

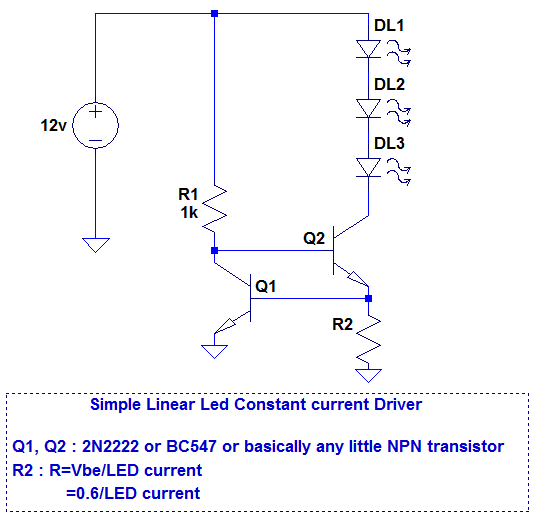
There is a more efficient way to drive Leds:
image post
The key is C1 : In this circuit, C1 is acting like a very low power dissipating resistor. Since the circuit is powered by AC, we can use the "reactance" of C1. The reactance is the "impedance" of C1 regarding to the frequency of the power source. Using this trick, the efficiency can be quite good.
The value of C1 is easily calculated to customize your LEDs forward foltage (see the reactance formula on Google). The fuse and varistor will help to protect against high voltage spike (wich passes C1).
Pros : Still quite simple, low cost, Good efficiency
Cons : No current regulation, C1 don't block high voltage spikes (bad reliability if no protection before C1).

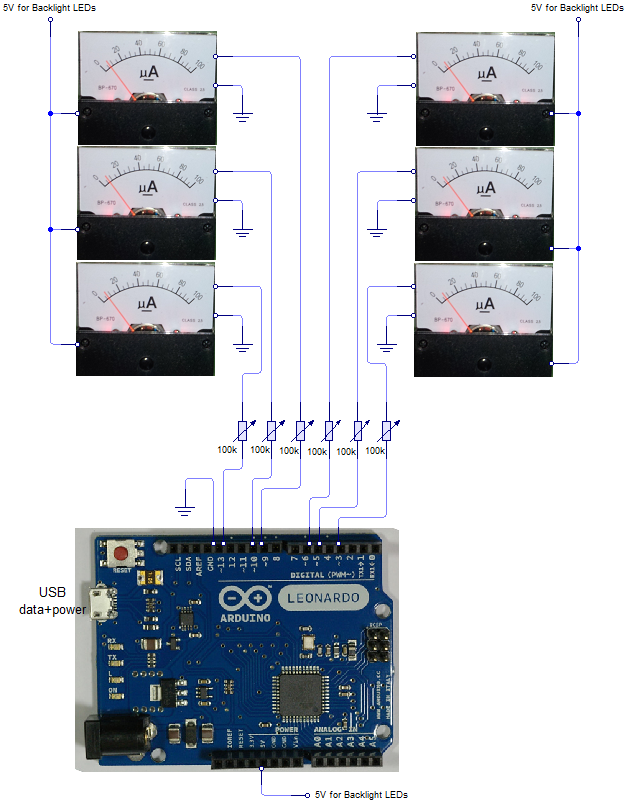
This way is one of the most common, we can find this circuit in a lot of high quality LED Bulbs (Cree, Osram, etc...).
image post
Pros : High efficiency (Switched mode), Good current regulation, good voltage spike resistance (only if well constructed), more power to the LEDs
Cons : Higher cost (transformer, mosfet...), EMI source, more failure sources (more components), more complexity (higher component count).

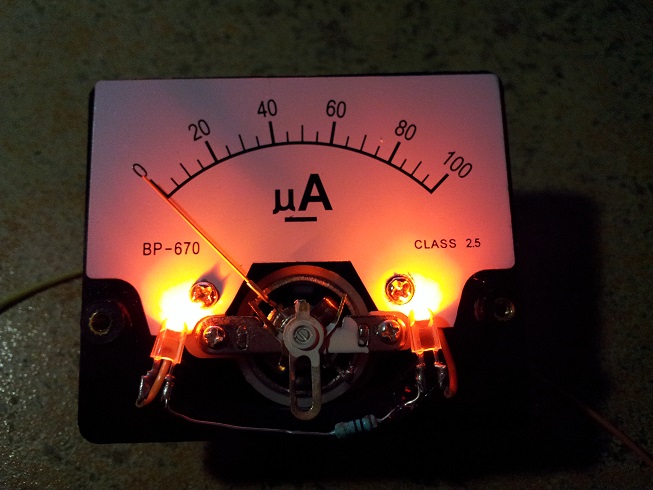
A fairly new driving mode is the folowing :
image post
Here, the trick is to power different numbers of LEDs according to amplitude of the mains alternance. This is done to keep the LEDs forward voltage the closest as possible to the supply rail. This ensure a good efficiency.
Pros : Low component count, relatively low cost, good efficiency, low profile (no big components).
Cons : Can be difficult to Dim (some LED can never be lighted), can't be flicker free (It uses the mains frequency to operate).

There are a lot of others ways to drive LEDs on 230Vac, this was just a glimpse !

Little PWM Dimmer

image post
image post

When you are building a Led lamp (or anything that produce a big amount of light), you often need to dim the light source (wich can be too bright).
The best way to dim a load with some power, is the PWM mode (Pulse Width Modulation).
This circuit switches the load ON and OFF repeatedly with a ON and OFF time related to the potentiometer position. The human eye averages these pulses and you see a steady dimmed source. This mode is very efficient because the excess power is not wasted in heat as in some linear solutions.
This circuit use only a small amount of parts and is simple to build on a prototype board or a home-etched PCB. With these parts values, the PWM frequency is about 200Hz.

image post

New Website

image post

Hi everyone ! With a little bit of delay, my new website is finally online !
You will find here some of my electronic stuff I made for Fun. Most of the time It's useless, but hey...It's fun !!!

As you can see, I choose to write my Website entierely in English (I'm French !) because I want it to be readable by the most people as possible, all over the planet !! (One day I could be famous...I hope !)

I have a lot of nice little projects to come but I don't have the time to put all online, so stay tuned !

Simple Linear LED Driver

This circuit can be usefull, this is just a simple LED Driver you can use to power some LEDs in your car where the supply rail is not stable (for example).

image post

Arduino System Meters

I wanted to have something that could show me the status of my computer. I wanted to see the CPUs, RAM and LAN usage.
To make this possible, I grabbed an Arduino Leonardo board, and simply hooked it to several 100uA analogue meters (through adjustable resistors).
A software running on my computer samples the 4 CPUs, the RAM and the LAN usage, and sends the data to the Arduino via USB.
The Arduino receives the data, smooth it and drives the meters using 6 PWM outputs.

image post
I modified the analogue meters to add a red-amber backlight (to look a bit more vintage) and put everything in a nice looking green (vintage machine color) painted Fibox enclosure.
image post
image post
Fun weekend project !

Ethernet controlled Lamp

image post

This time I decided to control my home lighting system by using my smartphone. To do this I needed an ethernet web server that could control some lamps. Fortunately, we can buy an arduino ethernet board that is perfect for the job. We just have to add mosfets for power switching of the Led lamps and let's go !!!

image post

I will put the code to download here, when I will have the time ;-)

Capsense RGB Lamp

Here is an RGB Capsense Lamp I've done for a friend. He wanted a lamp that can be changing color by touching it. I used the same circuit as the capsense lamp below, but I added 3 channels to drive the R,G and B colors on the led Board. It still uses the arduino capsense library.
I will add the circuit diagram as soon as possible...

image post

Here is a view of a RGB Lamp using this circuit. I made it and gave it a friend ;-)
Hoping you enjoy it !

image post

Capsense Lamp

Here is a Capsense Lamp I've done for a friend's birthday. This lamp is switched on and off by touching it's glass body (capacitive sensing technology). To be more fun, I added a poweroff/standby breathing led to help find the lamp in the dark. The circuit board is a custom made one (etched by myself). The circuit uses an ATTINY44 wich is perfect for this use. I slightly modified the Arduino Capsense library to use it with my circuit (but I'm not using arduino IDE, the code is written in C with avr-gcc).
Don't ask for the code, unfortunately I forgot to backup it before I formatted my home computer :'(

image post

Hoping you enjoy it !

Breathing Joule Thief

Here is just a simple fun experiment. I'm using the most simple joule thief circuit, powering a NE555 based breathing LED circuit. This circuit is fun to see but, unfortunately, the efficiency is very poor (it cannot run more than a night long). A better way to go would be to add a regulation circuit to PWM the joule thief (but it will result of a more complicated circuit).

image post

Hoping you enjoy it !

Breathing LEDs

Breathing LEDs has always been fascinating to me, it looks so modern and elegant ! Fortunately, it's quite easy to make a bunch of LEDs breath with a small amount of widely available components (and cheap !). And the best is: no microcontroller to program (less flexible but simpler for people who don't want to program !)

If you want to make your own, here is the circuit :

image post

Hoping you enjoy it !

Nand Gate Led Flicker

Another way to get flickering LEDs can be using Nand Gates. The trick is to mix two slightly different frequencies so the difference between the two frequencies will be your flickering rate. Since a lot of parameters (temperature, voltage, EMI, components...) can perturb the frequencies, the flickering rate will not be constant. You should know that it can be tricky to get what you want, but this circuit is simple to make and experiment. On my schematics, I put the same component values for the two oscillators, thats because in my case, the natural tolerances of the capacitors were sufficient to produces the two slightly different frequencies !

image post

Hoping you enjoy it !

"Sun in a jar"

If you want a nice looking little lamp, you can build your own sun in a jar. The trick is simple : just pick up a jar, open a 12V LED lamp, and glue the PCB into the jar cover. You can add a switch, like me ;-)
Here are the pictures :

image post
image post
image post

Hoping you enjoy it !

>>>Newer posts : Go to page 1<<<

Contact Info

E-mail: jonathancocaud@hotmail.com

Want more info - go to my "about me" page